EN
EN
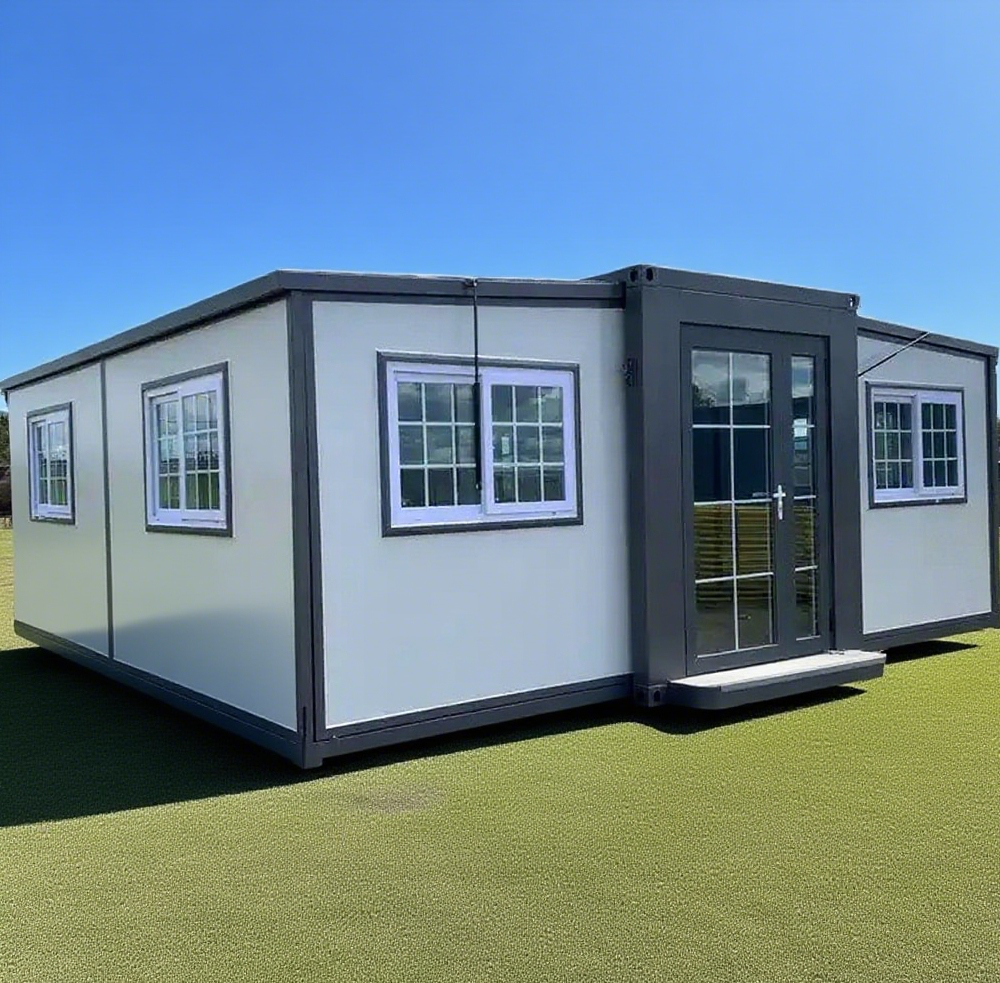
A container house has become one of the most practical and efficient modular building solutions available to construction teams, project managers, and businesses that need temporary or semi-permanent structures on short notice. Whether you are setting up a site office, a worker dormitory, or a temporary commercial space, the ability to assemble and disassemble a container house quickly is one of its most valuable advantages. Understanding the correct process from start to finish ensures that your structure goes up safely, functions reliably, and comes down without damage when the project is complete.
The speed of assembly and disassembly is not accidental — it is the result of deliberate engineering. A well-designed container house uses a standardized panel-and-frame system that allows workers with basic training to complete the full installation in a matter of hours or days, depending on the size and configuration. This guide walks through the complete workflow, from site preparation to final disassembly, so that your team can execute each phase with confidence and efficiency.
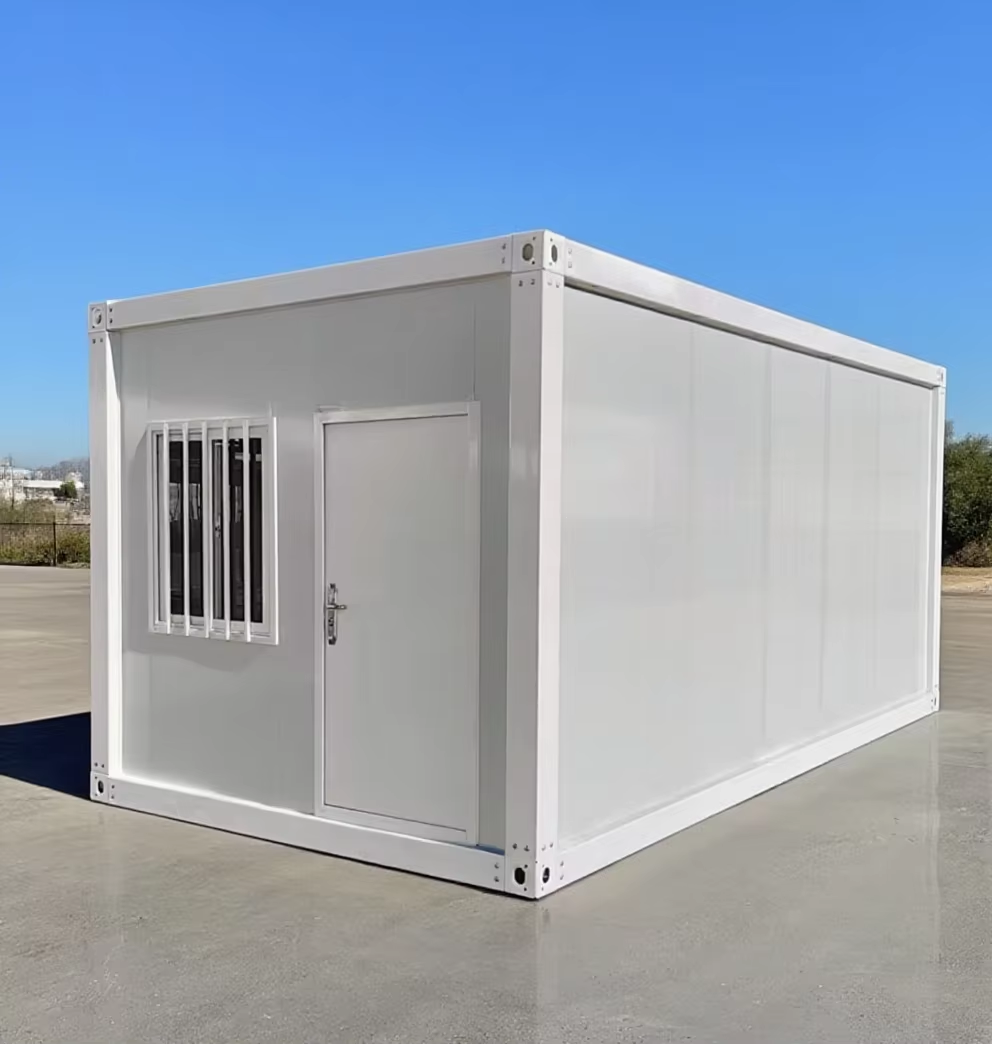
Understanding the Structure of a Detachable Container House
Key Components That Enable Fast Assembly
Before any assembly begins, it is essential to understand what a container house is made of and how its components interact. A standard detachable container house consists of a steel frame, wall panels, roof panels, floor panels, doors, windows, and connecting hardware. Each of these elements is prefabricated to precise dimensions, which means they fit together without the need for cutting, welding, or custom fabrication on site.
The steel frame forms the structural skeleton of the container house. It is typically composed of corner posts, top rails, and bottom rails that lock together using bolts or cam-lock connectors. This bolt-together design is what makes rapid assembly possible, as no specialized tools or heavy machinery are required beyond a standard wrench set and a rubber mallet.
Wall panels are usually made from a sandwich construction — two steel sheets bonded to a core of polyurethane foam or rock wool insulation. This gives the container house both structural rigidity and thermal performance without adding excessive weight. The panels slot into the frame channels and are secured with screws or locking clips, making them easy to install and equally easy to remove during disassembly.
Why the Modular Design Matters for Speed
The modular nature of a container house is the core reason why assembly and disassembly can be completed so quickly. Every panel, beam, and connector is designed to be interchangeable and reusable. This means that the same components can be packed, transported, and reassembled at a new location without any loss of structural integrity or performance.
For construction companies and project developers, this modularity translates directly into cost savings. Instead of building a new temporary structure at each project site, the same container house can be relocated multiple times over its service life. The investment in the initial unit is recovered across many deployments, making it a financially sound choice for businesses that operate across multiple sites.
Understanding the component logic also helps teams plan their labor allocation more accurately. A typical single-unit container house can be assembled by a crew of four to six workers in one to two days. Larger multi-unit configurations may require additional personnel and a crane for lifting roof sections, but the per-unit assembly time remains consistent due to the standardized design.
Step-by-Step Assembly Process for a Container House
Site Preparation and Foundation Work
The first step in assembling a container house is preparing the installation site. The ground must be level, stable, and capable of bearing the load of the structure. For most temporary applications, a concrete slab, compacted gravel pad, or adjustable steel footings are sufficient. The choice of foundation depends on the duration of use and the soil conditions at the site.
Adjustable steel footings are particularly popular for container house installations because they allow for minor height corrections without requiring concrete work. Each footing is positioned according to the floor plan layout, and the height is adjusted using a threaded mechanism until all points are level. This step is critical — an unlevel foundation will cause misalignment in the frame and make panel installation significantly more difficult.
Once the footings or slab are in place, mark the perimeter of the container house using chalk lines or stakes. This gives the assembly crew a clear reference for positioning the bottom frame rails and ensures that the structure is square from the very beginning. Taking extra time at this stage prevents costly corrections later in the process.
Frame Erection and Panel Installation
With the foundation ready, begin by laying the bottom frame rails along the marked perimeter. Connect the corner pieces first, then insert the intermediate rail sections. Tighten all bolts to the specified torque using a standard wrench — over-tightening can strip threads, while under-tightening will leave the frame unstable. Once the bottom frame is complete and verified as level and square, install the corner posts by inserting them into the corner connectors and securing them with the provided bolts.
Next, install the wall panels by sliding them into the channels on the bottom rail and leaning them against the corner posts. Each panel is held in place temporarily while the adjacent panel is positioned. Once all wall panels for one side are in place, install the top rail to lock them in position. Repeat this process for all four sides of the container house before moving on to the roof.
Roof panels are installed last and typically require two workers — one on each side — to lift and position each panel correctly. The panels slide into the top rail channels and are secured with screws along the edges. After all roof panels are in place, install the ridge cap and any waterproofing strips to ensure a weathertight seal. Doors and windows, which are pre-framed units, are inserted into their designated openings and secured with screws through the frame flanges.
Electrical and Finishing Connections
After the structural shell of the container house is complete, the next phase involves connecting utilities and completing interior finishing. Most container house units are pre-wired with conduit runs already embedded in the wall panels, which significantly reduces the time needed for electrical installation. The main distribution board is typically located near the entry door, and individual circuits branch out to outlets, lighting fixtures, and HVAC connections.
Water supply and drainage connections, if required, are routed through pre-cut penetrations in the floor panels. These penetrations are sealed with rubber grommets to prevent moisture ingress. For construction site offices and worker accommodations, a simple connection to the site water supply and a gravity-fed drainage line to a collection point is usually sufficient.
Interior finishing in a container house is minimal by design. The wall panels have a factory-applied interior surface that requires no additional painting or cladding. Flooring is typically a pre-installed vinyl or composite board that is already bonded to the floor panel. This means that once the structure is assembled and utilities are connected, the container house is immediately ready for occupancy.
Step-by-Step Disassembly Process for a Container House
Preparation and Utility Disconnection
Disassembling a container house follows the reverse sequence of assembly, but preparation is equally important. Before any structural components are removed, all utilities must be safely disconnected. Turn off the main electrical supply and disconnect all wiring at the distribution board. Cap or plug all water supply lines and drain any residual water from the plumbing to prevent spillage during panel removal.
Remove all interior furnishings, equipment, and personal items from the container house before beginning structural disassembly. This protects both the contents and the panels from damage. Inspect the structure for any signs of corrosion, panel damage, or fastener wear before disassembly begins. Damaged components should be tagged and set aside for repair or replacement rather than being repacked with the undamaged inventory.
Organize your packing materials and transport containers in advance. Each panel type — wall, roof, and floor — should be stacked and wrapped separately to prevent surface scratches during transport. Having a clear labeling system for components makes reassembly at the next site significantly faster and reduces the risk of missing parts.
Structural Disassembly Sequence
Begin disassembly by removing the roof panels first. Unscrew the ridge cap and waterproofing strips, then remove the fasteners along the top rail channels. Lift each roof panel carefully — two workers should handle each panel to avoid bending or dropping. Stack the panels flat on a clean surface or directly onto the transport pallet.
Once the roof is clear, remove the top rails from each side of the container house. This exposes the tops of the wall panels, which can now be removed by unscrewing the fasteners and sliding each panel out of the bottom rail channel. Work systematically around the perimeter, removing one side at a time to maintain structural stability during the process. Do not remove opposing walls simultaneously, as this can cause the corner posts to shift.
After all wall panels are removed, disassemble the corner posts and frame rails. Remove the bolts from each connection point and separate the components. Clean any dirt or debris from the connection surfaces before packing. Finally, remove the floor panels and disassemble the bottom frame. The entire disassembly of a single-unit container house can typically be completed by a crew of four workers in four to six hours, depending on site conditions and crew experience.
Best Practices for Maximizing Speed and Reusability
Team Organization and Tool Preparation
The single most effective way to accelerate both assembly and disassembly of a container house is to organize your crew into specialized roles before work begins. Assign specific tasks to each worker — for example, one team handles frame connections while another manages panel installation. This parallel workflow eliminates bottlenecks and keeps the project moving at a consistent pace.
Prepare all tools and hardware before arriving at the site. A standard container house assembly kit should include torque wrenches, rubber mallets, cordless screwdrivers, a spirit level, chalk lines, and a complete set of spare fasteners. Having everything on hand prevents delays caused by missing tools or hardware. Some experienced teams also use color-coded fastener bags to match each hardware type to its corresponding connection point, which speeds up both assembly and disassembly significantly.
Review the assembly drawings before starting work, even if your team has assembled the same container house model before. Minor variations between configurations — such as different window placements or additional partition walls — can cause confusion if workers assume the layout is identical to a previous installation. A five-minute briefing before work begins saves far more time than correcting mistakes mid-assembly.
Maintenance and Storage for Long-Term Reusability
The long-term value of a container house depends heavily on how well its components are maintained between deployments. After each disassembly, inspect every panel and frame member for dents, corrosion, or fastener damage. Apply touch-up paint or anti-corrosion coating to any exposed steel surfaces before storage. This prevents rust from developing during the storage period and ensures that the components are in good condition for the next assembly.
Store panels in a dry, covered environment whenever possible. Prolonged exposure to rain and UV radiation can degrade the surface finish and compromise the insulation performance of sandwich panels. If outdoor storage is unavoidable, cover the stacked panels with waterproof tarps and elevate them off the ground on timber bearers to allow air circulation and prevent moisture accumulation.
Keep a detailed inventory of all components after each disassembly. Record the condition of each item and note any parts that need replacement before the next deployment. A well-maintained container house can be assembled and disassembled dozens of times over its service life, making it one of the most cost-effective temporary building solutions available for industrial and commercial applications.
FAQ
How long does it take to assemble a container house on a construction site?
A single-unit container house can typically be assembled by a crew of four to six workers in one to two days, depending on the complexity of the configuration and site conditions. Multi-unit layouts with shared walls and corridor connections may take three to five days. Proper site preparation and pre-organized components are the most important factors in achieving fast assembly times.
Do I need special equipment or heavy machinery to assemble a container house?
For most single-unit container house installations, no heavy machinery is required. Standard hand tools including torque wrenches, cordless screwdrivers, and rubber mallets are sufficient. For larger multi-story or multi-unit configurations, a small crane or forklift may be needed to position roof sections or lift pre-assembled wall modules. Always follow the manufacturer's assembly guidelines for your specific model.
Can a container house be reused multiple times after disassembly?
Yes, a well-maintained container house is designed for multiple cycles of assembly and disassembly. The bolt-together frame and panel system allows components to be reused without loss of structural performance, provided they are properly inspected, cleaned, and stored between deployments. Regular maintenance of fasteners, surface coatings, and panel seals is essential to preserving the reusability of the structure over its full service life.
What foundation is best for a temporary container house installation?
Adjustable steel footings are the most practical foundation choice for temporary container house installations because they require no concrete work and can be leveled quickly on most soil types. For longer-term deployments or sites with soft or unstable ground, a compacted gravel pad or a simple concrete slab provides greater stability. The foundation choice should always be matched to the expected duration of use and the load-bearing capacity of the site soil.